Mighty Crumb Baking Company

Food To Live For™

S’More Salad

Ok, you won’t find chocolate or marshmallow in this super satisfying Asian-influenced salad, but it leaves me with the same lustful feeling after a huge bowl…I want some more!!!  Crunchy, salty, creamy, crispy, tangy with tastes from the sea, this salad is now a regular at my house for lunch on its own, and dinners as a side dish that could make me forget there’s other food on my plate. Rich in fiber, phytonutrients and minerals including calcium, zinc, manganese, and iodine, this recipe is inspired by a recent New York Times Magazine feature. I’ve changed the main veggie ingredients and made it gluten free. You can adapt it as you wish. The ultimate joy comes from the delicious dressing. Enjoy!

1 head Romaine lettuceIMG_1231

4 red radishes, thinly sliced

3 T nori seaweed, finely sliced (Note: I use seaweed from California whenever available to avoid potential contamination from Japan’s

radiation runoff.)

juice of 1 lemon

IMG_1232

The dressing

1 t red wine vinegar

1 t rice vinegar

2 t tamari or gluten free soy sauce

2 T organic white or brown miso paste

3 T tahini paste

1-2 t anchovy paste (Note: I use the imported kind in a tube which will keep in the fridge for a couple of weeks.)

3 T sesame seeds, toasted

3 T olive oil

1/2 cup kasha (You can find boxes of kasha–cracked buckwheat–in the grocery store.)

Wash and slice lettuce head into bite size pieces. Add radish slices. In a separate bowl, combine next 8 ingredients and mix well. In a sauté pan, heat olive oil and add kasha. Saute  until kasha becomes about two shades darker brown. Pour hot kasha and oil into dressing bowl. Stir while sizzling. Use dressing to taste; a large head of Romaine can accommodate the whole bowl of dressing.

The salad

The salad

Hunter-Gatherer Breakfast

The Paleo diet is getting substantial attention recently.  Not a weight-loss plan,  the Paleo (as in Paleolithic) diet is a choice of foods that harks back to simpler fare eaten up to 2 million years ago.  It is based on what was available then–meats, vegetables, fruits, nuts and seeds (no grains, simple carbs or processed foods)–well before farming and industry. Paleo followers and many nutritionists believe our bodies are better off when we eat like our Paleo ancestors did.  For more info on why, see below.  Here, adapted from the Primal Blueprint Reader-Created Cookbook (see http://www.marksdailyapple.com for this cookbook and more on Primal eating), are the easiest pancakes I’ve ever made…and they taste amazing.  They are grainless and flourless.  While the lemon souffle pancakes I shared in my previous post, “Coconut Oil–A New Staple in My Pantry,” are great too, these almond banana pancakes are simple, fast, delicious and paleo-healthful.

Makes 8-9 small pancakes

Banana Almond Pancakes

2 ripe bananas

1 egg, beaten

1 heaping T of almond butter

1/2 t cinnamon

1 T coconut oil

Combine the first four ingredients in a bowl.  Mix well.  This is your batter.  Melt half of the coconut oil in a heated pan or pancake skillet over medium heat.  Spoon a tablespoon of batter per pancake.  Cook two to three minutes per side until golden brown.  Sliding the spatula quickly under each pancake  helps keep its round shape.  Repeat process for second half of batter.

Benefits of a Hunter-Gatherer Diet   Since 99.99% of our current genes existed before agriculture did, our bodies are almost identical to our hunter-gatherer ancestors.  For more than 2 million years the human diet consisted of lean game meat,  fruits and vegetables.  Humans haven’t had much time, evolutionarily speaking, to adapt to our current fatty, processed, high carb diet. It wasn’t until the invention of the agricultural industry that humans began ingesting large amounts of sugar and starch in the form of grains and potatoes.  We all know the complications that can ensue from eating processed foods and too many fats and sugars through carbs and sweets  including obesity, diabetes, heart disease and cancer.  Believe it or not, according to Robb Wolf, author of  The Paleo Solution, current research also shows a link between Neolithic foods including grains, legumes and dairy and autoimmune diseases such as Lupus, Rheumatoid Arthritis, Multiple Sclerosis and many other conditions.  He adds that people have found significant improvements in autoimmune diseases by eliminating the Neolithic foods and adopting nutritious Paleo options.

According to Joseph Mercola, D.O, “while the human shift to agriculture produced indisputable gains for man — modern civilization is based on this epoch — societies where the transition from a primarily meat/vegetation diet to one high in cereals show a reduced lifespan and stature, increases in infant mortality and infectious disease, and higher nutritional deficiencies. We all need a certain amount of carbohydrates, of course, but, through our addiction to grains, potatoes, sweets and other starchy and sugary foods, we are consuming far too many. The body’s storage capacity for carbohydrates is quite limited, though, so here’s what happens to all the excess: they are converted, via insulin, into fat and stored in the adipose, or fatty, tissue.”

What to do?  There’s lots of info out there on the Paleo Diet if you are interested to learn more.  That way you can choose what you feel is best for you.  To start, check out several websites I have been following:  http://www.mercola.com; http://www.marksdailyapple.com; and http://robbwolf.com.

Kraut News


I’m happy to report that after fourteen days of fermenting on the counter, my red cabbage and radicchio  krauts were sour and delicious.  The cabbage is still crunchy and juicy while the radicchio has a somewhat more tender mouth feel.  Because I tasted and liked them at the two-week mark, I refrigerated them.  You can keep fermenting and tasting if you’d like yours more sour.  Let me know if you are making your own sauerkraut and how it turns out!

Fermished? Ferment.

Have you heard the news on fermented foods?  They are the latest health food trend…for a good reason.  Filled with probiotics, they replenish the beneficial intestinal bacteria needed for proper digestion, a robust immunity, and a body in balance.  The lactic acid fermented foods produce aids in the absorption of protein and minerals.  The good bacteria restores the intestinal flora that was plentiful in “the old days” when people regularly  ate traditional, whole foods diets and exposed themselves to bacteria on a regular basis.  In our modern, antiseptic world, consumption of antibiotics and our decreased natural exposure to bacteria has left our gastrointestinal systems depleted.  Restoring probiotics can have long-term benefits  including the prevention or reduction of colon cancer, lactose intolerance and rotavirus diarrhea, dental cavities, and inflammatory bowel disease.  Foods with probiotics include some yogurts, kefir, raw milk and cheese, sauerkraut, kim chee, pickled veggies (including pickles), miso, and even sourdough bread.

Some of these foods found in the supermarket are actually not fermented, but rather inferior imitations.  Steer clear of sauerkraut made with vinegar to get that sour, fermented taste and “yogurt” that is really a sugary pudding.    To speed the healing of my gluten-intolerant gastrointestinal system, I’m eating daily doses of probiotic foods including kefir in breakfast smoothies, raw cheese (from unpasteurized milk), and sauerkraut which I’m loving in salads, with meats, on turkey Reuben sandwiches, even on GF crackers with hummus or healthy dip.  I’ve just learned that sauerkraut, which has become a high-priced gourmet item, is easy to make.  I’ve been buying it, but this week I decided to try my own versions of several classic sauerkraut recipes I found on the web.  They’re fermenting as we speak.  I’ll let you know in two weeks how they turn out.  Meanwhile, you can experiment yourself if you are so inspired.

Whichever recipe and container set up you choose, the key is to keep the veggies submerged under the brine so that it is never exposed to air.  That protects it from growing mold and bad bacteria.  Here’s the classic:

Old Fashioned Lacto-Fermented Sauerkraut

5 Pounds Cabbage (about two heads, organic preferable)
3 1/2 tablespoons coarse sea salt (unrefined)

First make sure that all dishes used for this project are very clean. You will need a crock or a large non-reactive bowl, such as the glass or ceramic, a plate that fits snugly inside and something to weigh the plate down such as a bowl or glass filled with water.

Shred cabbage in a food processor or slice thinly with a knife and place in the bowl or crock you will be fermenting in. Toss with the salt and cover with some kitchen towels. Leave for 15 minutes to an hour to allow the salt to draw out the juices of the cabbage.

Using your hands, firmly massage the cabbage to help break it down as you make it tight-fitting in the bowl. Place the clean plate on top and weigh it down with whatever you are using. Press down gently, but firmly. The liquid from the cabbage should rise to the top. You will want the liquid to cover the plate with room to spare within in 12-24 hours. If it hasn’t risen above the plate by that point, make up some salt water my mixing one cup of filtered water with one teaspoon of sea salt and use as much as you need. Cover with kitchen towels to protect it from flies and dust.

Each day you will remove the plate, and rinse it. If there is any “scum” on the surface of the water, remove as you much of it as you can with a spoon. Start tasting the sauerkraut after a few days. It will start to sour within a few days and will continue to “ripen” as the days go on. How quickly it ferments will depend on the temperature of your house. We like it after about ten days. Before that point, we just think it lack the depth of flavor we want.  You can stop the fermentation process when it tastes good to you.

When it’s fermented enough for your taste, Bottle it up in clean mason jars, and place in the refrigerator where it will keep for a long time.

Here are my twists on the classic in smaller batches:

1. Apple Dill Kraut  Following the recipe above, I cut it down to 1/4 of the amount using 1/2 head of red cabbage and 1 T sea salt.  I added 1 T chopped fresh dill and 1/2 of an apple peeled and chopped.  Look below left to see how I set up the container using a German glass jar with rubber rim and a small glass inside to push the kraut down and keep it submerged:

2. Radicchio Apple   I shredded a large head of radicchio, and 1 T sea salt.  I added 1/2 of an apple, peeled and chopped.  I set up this one using a Ball jar with a shot glass inside to push the kraut down and keep it submerged.  See below right for this contraption:

In Time for a GF Passover

In time for Passover, I am re-posting my alternative, gluten-free “matzoh” balls made from quinoa flakes.  Not only are they a light, fluffy take on the old classic, but they are higher in protein using quinoa rather than wheat flour.  Even if you aren’t gluten free, these could become your new favorite balls.  Enjoy and happy Passover!

Xoxoxo
Nan

Quinoa Souffle “Matzoh” Balls–This recipe is a gluten-free, updated twist on a fabulous gourmet matzoh ball recipe from Chef Jeff Nathan.

Makes approximately 12 balls

3 eggs separated

1/4 c canola oil

1 t Himalayan salt

1 t freshly ground pepper

1 t parsley, chopped

1 c quinoa flakes (These come in a box; available at Whole Foods and other specialty markets.)

1/2 t baking powder

1/2 t xantham gum

1 t onion flakes, optional

Fill large pot with water and put over high heat to boil.  Meanwhile, mix yolks with oil, salt, pepper and parsley.  In a second bowl, whip egg  whites to soft peaks (not stiff, dry peaks). In third bowl, combine last four dry ingredients.  Stir yolks into dry ingredients.  Next, fold egg whites into “dough”.  Let dough sit 20 minutes.  Using a teaspoon, scoop dough and form into small balls about 1 1/2″ wide; they will expand as they boil.  Drop into boiling water.  Turn balls after a few minutes to be sure both sides are evenly cooked.  Boil for 20-25 minutes.  Add to your chicken soup.  Voila!

I Have a Bone to Pick with Supplements

Two Mighty Sesame Kale Salads

1) Sesame Tamari,  serves 1 (adapted from Diana Stobo)

3 c bite-sized organic kale pieces from about 10 medium sized leaves, stemmed and torn

1 t dark sesame oil

2 t tamari (or soy sauce if you’re not gluten free)

1 t rice wine vinegar

1 t sesame seeds

1/2 t chia seeds

1/2 t ginger, minced (optional)

Combine all ingredients in bowl.  Toss leaves until evenly and fully coated.  Let sit a few minutes before eating as dressing becomes absorbed into leaves.

2) Miso Tahini, serves 1 (adapted from NavitasNaturals.com)

3 c bite-sized organic kale pieces from about 10 medium-sized leaves, stemmed and torn

1 T tahini

1 T miso paste

1 T lemon juice

1 garlic clove, minced

1 t ginger, minced

1-2 T water

To make dressing, combine pastes, lemon juice, garlic and ginger; mix well.  Add water until consistency is creamy.  Toss with kale.

Who wants to be dense?  I do…in my bones that is.  I’ve been a dairy lover my whole life and thought that was the key to bone health.  When I turned 45 and learned I was going through crazy hormonal shifts, I had my first bone density test and discovered that my bones were thinning.  What!?  Did I miss out on important years of supplementing vitamins and minerals?  Was it the antibiotics I took for years, my coffee addiction, my thin teenage frame?  Could it be, in part, due to the dairy foods which I now learned create an acidic environment, causing our bones to leach out neutralizing calcium into our bloodstream?  For a quick fix, my doctor prescribed a bisphonsphanate (drugs like Fosomax and Boniva). After online research, I learned they can paradoxically yield dense, but more brittle bones–actually putting them at risk of fracture.  Healthy bones are dense and supple, not brittle. Next option, please.  My doctor suggested 1200 mg of calcium pill supplements daily.  I added my own supplement cocktail of complementary vitamins which help anchor calcium to bone: D3, vitamin K, and magnesium.  Fast forward six years.  My bone density was slightly worse.  And, interestingly, my fingernails–a clue to bone health according to Ayurvedic medicine–were peeling and splitting.

Gluten and Osteopenia  This is where gluten came in to my story.  By researching my condition (osteopenia, or thinning bones) online, I discovered a frequent connection to gluten intolerance.  Gluten is linked to many other symptoms as well including inflamed joints and muscles which I also had.  First step: eliminate gluten.  Fast forward one year of gluten-free living, and my nails…were still a mess.  To make matters more complicated, published research at that time (http://www.webmd.com/heart/news/20100729/study-calcium-may-increase-heart-attack-risk) found calcium supplements can cause heart attacks. What’s a girl to do?

Food Supplements  Coincidentally, I saw a segment on split nails on the Today Show and learned a simple solution…kale.  It’s high in vitamin K, calcium and magnesium among others.  Enter the Mighty Asian Kale Salad, recipe above.  I ate it three times a week or more for the next month.  It did the trick!  My nails were suddenly strong and gorgeous.  This was so encouraging that I started “supplementing” naturally and learned that dark green leafy veggies, red cabbage, and sesame are some of the best providers of bone-building nutrients, not to mention the many other benefits they offer (protein, other vitamins and minerals, and phytonutrients with antioxidant power), except for vitamin D3.  D3, and not just any D, is key to bone health.  A simple blood test will tell you whether you are vitamin-D deficient.  While sunshine and milk are both good sources of D, it is important to take a high quality D3 supplement to get the 40+ IU that we need. (Note: The jury is still out on whether it’s smart and safe to take up to 2000 IU daily which some experts advise.)  Here, a few of my favorite foods with awesome bone benefits:

Daily Value of Raw, Chopped Veggies, and Key Ingredients in Recipes Above

                                    Calcium                  Vitamin K                Magnesium

1 c kale                                 9%                           684%                             6%

1 c broccoli                          4%                           116%                              5%

1 c spinach                           3%                           181%                             6%

1 c watercress                      4%                          106%                             2%

1 c red cabbage*                 4%                            42%                              4%

1 c lemon juice                    2%                           0%                                4%

1 c miso                              16%                          101%                             33%

1 T tamari                            0%                            0%                               2%

1 T ginger                            1%                             0%                               2%

1 T tahini                             6%                             0%                              4%

1 oz sesame seeds             140%                         0%                             126%

1 oz chia seeds                   18%                           0%                              0%

*My favorite way to eat cabbage:  raw sauerkraut which has the added benefit of being fermented; fermented foods are great for restoring healthy bacteria in our digestive systems.

Sources  1. Check out this awesome nutrition source from Self Magazine where you can learn all the other benefits of these and other vegetables:  http://nutritiondata.self.com/facts/vegetables-and-vegetable-products/2461/2

2. And take a look here for more info on bone-friendly and bone-leaching foods:  http://www.care2.com/greenliving/12-foods-with-super-healing-powers.html?cid=Facebook_12-foods-with-super-healing-powers

Next Steps  My next two-year bone follow-up is this spring.  We’ll see if this dietary change has improved my bones.  In the meantime, I won’t tell you to stop taking vitamins.  You’ll need to make an educated choice for yourself.  However, from what I’ve seen so far with my own body, and what I’ve deciphered from many conflicting, even contradictory voices out there, we absorb vitamins and minerals best from real food, or if necessary, from food-grade supplements.

So What’s So Great About Coconut Oil?

SPECIAL ISSUE FOR THOSE WHO REALLY WANT TO KNOW

If you are craving a recipe this week, please check out previous posts that include coconut oil.

My friend’s daughter learned that solid fats such as shortening are toxic, and she asked me why coconut oil is good for you since it too is a solid fat.   I knew a few of the touted coconut oil benefits, but while I’ve been including it in many of my posts as a healthy, delicious ingredient, I wasn’t perfectly clear as to how and why it is different from other solid fats.  This one’s for you Carly.  Thanks for bringing it to light.

Not all fats are created equal.  According to Wikipedia, “trans fat” is the common name for unsaturated fat with trans-isomer fatty acids. Though rare, natural trans fats can be found in beef and dairy products, and in this form can actually have beneficial effects on cholesterol and triglycerides when consumed.  But in the food manufacturing industry, trans fats are made by adding hydrogen to vegetable oil through a process called hydrogenation, which makes the oil more solid, less likely to become rancid and more…unhealthy.  Rancidity, a health threat itself beyond its resulting funky taste, is the process of oxygen breaking down the fats and producing harmful free radicals.  While trans fats help foods stay fresh longer, they can raise LDL (bad) cholesterol and lower HDL (good) cholesterol levels and interfere with natural metabolic processes leading to diseases.

Beware of trans fats in hydrogenated and partially hydrogenated vegetable oils used in processed foods and in solid shortening and margarine.  By contrast, the two oils touted by natural food chefs in cooking for their health benefits and stability, meaning they are least likely to turn rancid:  olive oil and coconut oil.  That’s because an oil is pretty stable if it’s mostly saturated (coconut), or if it’s mostly mono-unsaturated (olive).

Saturated vs. trans fats.  For years, research on the American diet yielded negative press about saturated fat, linking it to high cholesterol and heart disease, multiple sclerosis, cancer and other health conditions.  While we  know that too much saturated fat can lead to clogged arteries, only recently did researchers come to understand that trans fats have likely been the major disease culprits all along.  It’s interesting to note that until the 1970’s, food producers used coconut oil to get that buttery flavor and texture.  When it was replaced with partially hydrogenated vegetable oil–most often made from soybean oil–the American obesity and diabetes epidemic began.

Coconut oil–seemingly saturated with benefits.  1. While virgin* coconut oil (see paragraph below on going virgin) comes in solid form, it is not a hydrogenated trans fat.  2. The main saturated fat in coconut oil is lauric acid, a medium-chain fatty acid rather than a long-chain found in most common vegetable or seed oils.  Lauric acid increases levels of good HDL as well as bad LDL in the blood, but doesn’t change the overall ratio of the two which is key.  In addition, a study published in the American Journal of Clinical Nutrition in 2008 found that because of their chain length, medium-chain fatty acids can be absorbed in the gastrointestinal tract and transported directly to the liver, bypassing the process of fat absorption by adipose or fatty tissue. Translation: There’s less opportunity for the storage of medium chain triglycerides than for other saturated fats.  3. A 50-year study published in 1987 showed the anti-cancer effects of coconut oil.  In chemically induced cancers of the colon and breast, coconut oil was far more protective than unsaturated oils; 32% of corn oil eaters got colon cancer as compared to only 3% of coconut oil eaters.  Many studies since the 1920’s have shown an association between consumption of unsaturated oils and the incidence of cancer.  4. Virgin* coconut oil has a long shelf life; even after one year at room temperature, coconut oil shows no evidence of rancidity.  Inside the body, once consumed, other oils/unsaturated fats will oxidize (turn rancid) very rapidly due to being heated and mixed with oxygen.  Not so with coconut oil.  Because of this, some researchers believe coconut oil contains antioxidants.

*Go virgin.  Before coconut oil became the current “hot” health food of today,  studies that shunned it used unhealthy “refined” coconut oil to raise the cholesterol levels of their rabbits.  Refined coconut oil is typically hydrogenated or partially hydrogenated fat that, as you know, contains toxic trans fats. Refined oil is highly processed, has lost many good essential fatty acids, antioxidants and other positive components, and, due to its unsanitary original condition, gets bleached and deodorized.  Yuck! By comparison, “virgin” coconut oil is not hydrogenated, is minimally processed, free of trans fats, has not been chemically treated, has its own health profile, and tastes better.  

How much fat should we eat?  We know that too much saturated fat from animal fat, butter, cheese, whole milk, ice cream, cream, etc. can cause elevated cholesterol and cardiovascular disease.  The new Dietary Guidelines for Americans recommend that no more than 10% of total dietary calories a day come from saturated fat. For a 2,000-calorie diet, that’s about 20 grams.  And overall, it is recommended that our daily intake of fat from all sources be limited to between 20 and 35% of our total daily calories (or 40-70 grams for a 2000-calorie diet).

Beans, Beans They’re Good For Your Heart (and other things)

Until today, my entries have been health-centered, nutrition being the focus, and recipes appearing last.  Beginning today, recipes are going to be front and center with their health benefits following as a close second.  Why the change?  I don’t know about you, but the more I read about food and health, the more I think about what I eat.  While this nutri-consciousness is an important step in making informed choices about what we eat and why, all that thinking was beginning to cloud my passion for delicious food and cooking.  So, moving forward with the confidence that my choices are naturally healthy ones, it’s time to put joy first again:  I am reestablishing my focus on the gorgeous, satisfying, captivating effect of good food.

Today’s recipe, a cannellini bean hummus, is a variation of my mother’s amazing classic garbanzo hummus recipe as well as the result of having a huge container full of leftover cooked beans.  I bought dried cannellini (knowing that canned beans likely contain the BPA found in the can’s lining) soaked them overnight changing the water once, and simmered them covered by 2″ of broth (made with “Better than Bouillon”) for 40 minutes.  I had almost twice the volume of beans than when I started!  You’ll note below that the darker colored beans have higher  antioxidant levels, so feel free to experiment with all kinds of beans for this recipe.  Cannellini beans make it a light, creamy  hummus.

Cannellini Hummus

3 cups cooked cannellini beans, (start with about 1 1/2 cups dried and see instructions above for soaking and cooking)

2-3 T lemon juice, if using Meyer lemons you may need more to taste

2 large cloves garlic

1/4 c olive oil

1 1/2 t fresh rosemary, finely minced

1/4 t Himalayan salt, or more to taste

In a food processor, blend all ingredients until smooth.  Serve with sliced jicama “chips”, organic corn chips, or your favorite veggies and crackers.

Bean Nutrients  Beans are naturally low in total fat, contain no saturated fat or cholesterol, and are rich in fiber, protein, calcium, iron, folic acid and potassium. They are high in flavanols, cancer-fighting phytonutrients found in many plant-based foods.  A study by the USDA found that three varieties of beans–red, kidney and pinto–ranked in the top four foods studied beating many fruits and vegetables for antioxidant benefits. Beans get their color and antioxidant activity from phenol and anthocyanins, and there is a link between the darker colors and higher phenol levels. This study found red beans to have the highest antioxidant level, with black beans coming in second place.

Being a legume, beans are in a class of foods that includes peas and lentils. One-quarter cup of any legume is equivalent in protein to an ounce of meat. A cup of legumes contains about 15 grams of protein, soybeans being the exception coming in at 29 grams of protein in a cup!  Beans are also a good source of soluble dietary fiber, containing about 4 grams per cup of cooked beans.

Bean Health Benefits  Published research has found that eating beans on a regular basis reduces the risk of heart disease, cancer, diabetes, and obesity. Several studies published in the Archives of Internal Medicine found significant reductions in heart disease and breast cancer risks by eating beans two to four times per week. Further, research by the National Cancer Institute found that beans reduce the risk of colon cancer.  Being high in soluble fiber, beans reduce cholesterol and/or tryglycerides which helps the heart.  In addition, folate found in beans is a B vitamin which reduces homocysteine levels in the blood; this also reduces the risk for cardiovascular disease. It’s the phytonutrients in the beans that are the superheroes preventing breast cancer.  And it’s the fiber and phytonutrients that maintains colon health.

Getting Enough  So, how do we incorporate 2 to 4 cups of beans into our weekly diets?  Try making hummus and other bean dips, making bean soups and side dishes, and including beans in tacos and salads.

Three Cups of Tea, Please

You probably already know tea is good for you.  Over the past decade and even this week, studies of green, black and Oolong teas have found they are rich in antioxidants which can help stave off several cancers, including, skin, breast, lung, colon, esophageal, and bladder.  The teas have also been shown to improve the health of arterial walls, lower blood pressure, reduce our risk for heart disease, lower cholesterol, prevent Alzheimer’s and reduce body weight and abdominal fat. (Sources: Harvard Health Letter, WebMD)

Getting the Most from Your Tea  Catechins, a group of disease-fighting flavonoids and antioxidants, are the powerhouse behind tea’s health benefits. The best way to get the catechins and other flavonoids in tea is to drink it freshly brewed from organic tea leaves. (Who needs the extra pesticides?)  Decaffeinated, bottled tea drinks, and instant teas have fewer of these compounds. Steep tea for three to five minutes to bring out its catechins; the longer you steep, the more flavonoids will seep into your brew.  Several studies suggest drinking at least three cups each day to get the best tea benefit.

Chai – An Uber Tea  Now, let’s take it up a notch.  Chai tea, which comes from Ayurvedic medicine, contains many health-promoting spices that are also rich in antioxidants and anti-inflammatory properties.  These include ginger, cinnamon, cloves, cardamom, black pepper and fennel.  Chai is a literal antioxidant elixir.  Since dairy milk is reported to block the absorption of antioxidants, I substitute almond milk in my chai recipe, below.
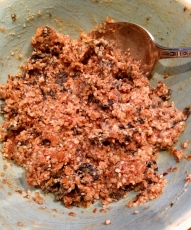
Edible Tea  Did you know you can eat tea?  I absolutely love the Tea Leaf Salad at Burma Superstar at 309 Clement St. in San Francisco.  Blogger Tea & Cookies explains the salad well: “The tea leaves are fermented, apparently hand-carried back from Burma, and have a deep vegetal flavor unlike anything I’ve ever tasted before. It is mixed at the table with romaine lettuce, peanuts, fried garlic and split yellow peas, sesame and sunflower seeds, tomato, and dried shrimp… It is crunchy and crispy and the flavor is out of this world, a musky, fragrant taste I’ve found nowhere else.”
Below, I’ve attempted to recreated Burma Superstar’s recipe using all organic ingredients including the tea leaves.  It’s not quite as exotic tasting as the restaurant’s fermented Burmese leaves, but it has great flavor, texture and healthfulness!
Chai (Adapted from the Culinary Institute of America Master Chefs)
3 cinnamon sticks
4 teaspoons sliced ginger (no need to peel)
1 T cardamom pods
1 1/2 t fennel seeds
1/4 t whole cloves
1/8 t black peppercorns
4 c water
12 bags or 4 t black tea leaves (traditionally Darjeeling is used)
1/4 to 1/2 c honey or to taste
4 c almond milk (or your favorite milk)
If you have a high-powered blender, grind all spices together first and place into pot with water (otherwise brew spices whole, cracking cinnamon sticks, and simmer for an additional five minutes).  Boil 10 minutes, stirring occasionally (15 minutes if using whole spices).  Off heat.  Pour liquid through a fine mesh strainer into an 8 cup or larger Pyrex or ceramic pitcher.  Stir in honey to taste.  Add milk to strained tea and stir.  Enjoy hot or cold.
Tea Leaf Salad
1/3 c yellow split peas
2 T olive oil
1/4 c apple cider vinegar
1/3 c green tea leaves (I used Republic of Tea’s Organic Dancing Leaves Green Tea sold bulk at Whole Foods.)
3 t Thai fish sauce (You can get this at Asian markets.)
2 T sesame oil
1/4 c sesame seeds
1/3 c sunflower seeds, unsalted
1/2 c peanuts, unsalted
2  T olive oil
8 large cloves garlic, peeled and sliced thinly lengthwise
2 T fresh lime juice
2 t cilantro, finely chopped
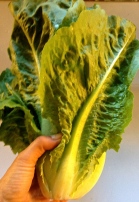
2/3 head of romaine lettuce, sliced into thin strips crosswise
1 small tomato or 1/2 of a large tomato, cut into small cubes
6 shrimp, precooked and shelled, sliced down the middle lengthwise
To minimize clean up, I reuse one small saucepan and one small saute pan, rinsing and wiping cleaning between uses.  Place split peas into  saucepan with 2/3 c water.  Bring to boil and then immediately turn down to simmer.  Simmer for 10 minutes or until water has evaporated.  Pour 2 T olive oil in saute pan.  Add peas to oil and saute for 5 minutes.  Turn peas out onto paper towel placed on a dish to drain.  Rinse and reuse your saucepan to cook the tea leaves, the apple cider vinegar and 2 of the teaspoons of fish sauce.  Bring to boil, lower heat and simmer for 5 minutes to soften tea leaves.  Drain any remaining liquid out into sink.  Rinse and reuse your saute pan adding the sesame oil.  Put tea leaves into saute pan and saute for 5 minutes.  Turn leaves out onto second paper towel to drain.  In clean, dry saute pan toast individually the sesame seeds, sunflower seeds and peanuts until lightly browned.  Pour each into individual small bowls when done.  Next, place the olive oil into this saute pan and saute garlic slices until browned on both sides being careful not to burn.  Off the heat and remove garlic with slotted spoon onto paper towel, keeping the oil in the pan. 
To make the dressing:  To the hot oil in the pan combine lime juice, the last 1 t fish sauce and cilantro.
To assemble the salad for presentation:  On a platter, place lettuce strips in center.  Arrange shrimp slices on top of lettuce.  Group each item separately around platter–yellow peas, sesame seeds, sunflower seeds, peanuts, tea leaves, garlic, and tomatoes.  Pour dressing over lettuce.  Toss it at the table, combining all ingredients.

Nourish Me, Starve Cancer

What do these foods have in common?

By now we all know the benefits of eating well to build immunity and prevent disease.  We may also be familiar with the benefits of phytochemicals and antioxidants–found abundantly in brightly colored fruits and vegetables–and their ability to bind to oxygen-free radicals in our bodies to prevent potential cancer-causing oxidation.  Now, recent research reveals a completely new and exciting cancer-fighting potential of certain healthful foods…the ability to starve cancer cells by stopping angiogenesis (the proliferation of blood vessels), thereby cutting off blood supply to those cells.  Among these foods are strawberries, garlic, leafy greens such as kale, olive and grapeseed oils, turmeric, soy, red wine and green tea.

Under normal, healthy conditions, our bodies keep our blood vessel growth in balance.  Blood vessels proliferate normally in wound healing, during menstruation, and pregnancy.  They also decline when no longer needed so as to keep them in check.  When we’re out of balance, too few blood vessels can cause problems including chronic wounds that will not heal, and heart disease, and unrestrained blood vessel growth can signal the presence of many diseases.  According to recent research by William Li, M.D., President and Medical Director, The Angiogenesis Foundation, many diseases including cancer, diabetes and maybe even obesity have the common denominator of blood vessel growth gone wild…or angiogenesis.

Cancer starts as a cluster of mutated cells.  According to Li, microscopic tumors exist in all of our bodies as we age.  When fueled by a blood supply, these tumors can proliferate and become dangerous.  Without that fuel these cells can exist and never become a threat.  There are several anti-angiogenic pharmaceuticals on the market to treat cancer by curbing blood vessels (Tarceva, Avastin, etc.).  Beyond drugs, according to Li, “mother nature has laced a large number of foods, beverages and herbs with naturally occurring inhibitors of angiogenesis.”  Eating them can boost our bodies’ immunity and prevent blood vessels from forming and feeding cancer cells.

Curious to learn more? Watch this very informative 20-minute TED Talk by William Li to learn more about the prevention of angiogenesis through what we eat:  http://www.ted.com/talks/william_li.html

One Recipe, Two Sauces

1. Cutting Edge Green Goddess Dressing 

2. Green Peanut Sauce

I choose organic produce whenever possible.  Use the dressing on salad or as a marinade for chicken.  Use the peanut sauce on pasta and as a sauce on grilled or sautéed chicken and beef strips for saté.

1/2 cup kale leaves (2-3 leaves), tough part of stalks removed

1 lemon, peeled

1 scallion, cut into several pieces

1/4 cup parsley leaves

5 fresh or frozen strawberries

1/2″ knob fresh ginger, peeled

1 clove garlic

1/4 cup rice wine vinegar

2 T olive oil

2 T sesame oil

2 T tamari (or soy sauce if you are not gluten-free)

1/2 t turmeric

1/4 t crushed red pepper

STOP HERE FOR DRESSING.  FOR PEANUT SAUCE, CONTINUE.

1/2 cup peanut butter

1 additional T tamari

Place all ingredients into a high-power blender and blend until smooth.

Post Navigation